Create a Webinar Signup Chatbot With Google Sheets
Now that in-person events have been largely replaced by online events, the webinar space has become quite crowded and there is a major fight for attention happening right now.
Enter chatbots, more particularly lead-generation chatbots, that can be very easily added to your own website in order to get more subscribers to your next webinar.
In this article, I’ll explain how to create a lead-generation chatbot that subscribes visitors to your next webinar using Google Sheets and CSML Studio, a low-code platform built on top of the open-source CSML programming language.
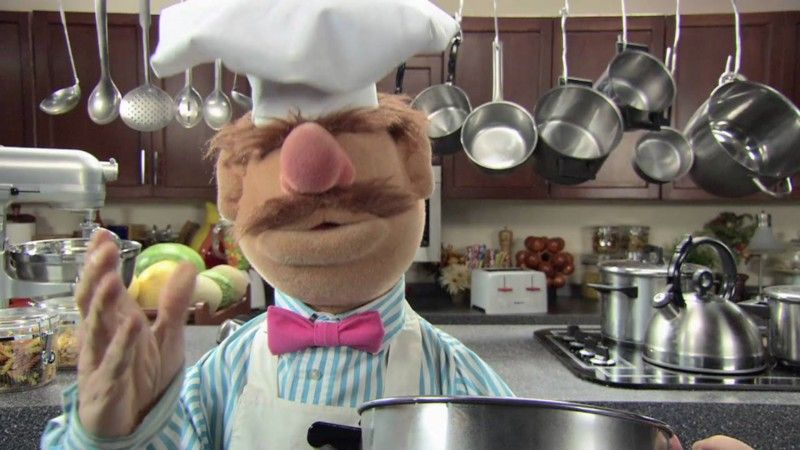
The chatbot will gather a visitor’s name, email and phone number, then save their data in a Google Sheets spreadsheet to register them to an upcoming fictitious cooking webinar with our favorite cooking host, Swedish Chef!
Creating the chatbot
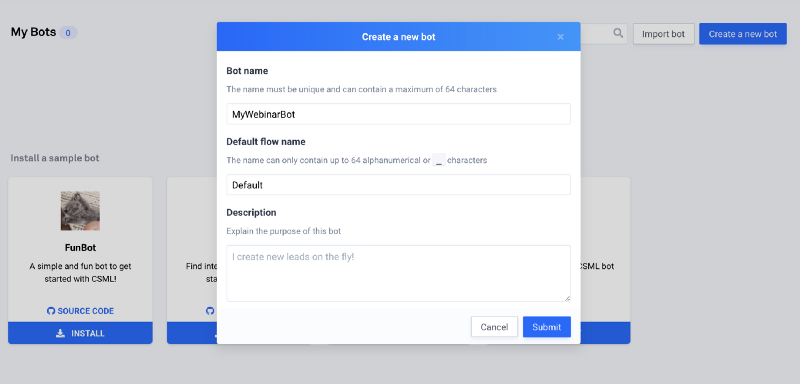
To get started, you will need to create a free account or login on https://studio.csml.dev, then create a new chatbot.
On the chatbot authoring page, you will be able to code your chatbot on the left and test it on the right. The CSML programming language is very easy to learn, you can always refer to the documentation here if necessary but if you follow along here you will be just fine.
In order to register visitors to your upcoming webinar, you will need to provide them with some information about the webinar and to retrieve their contact information.
Let’s start with greeting the user:
start:
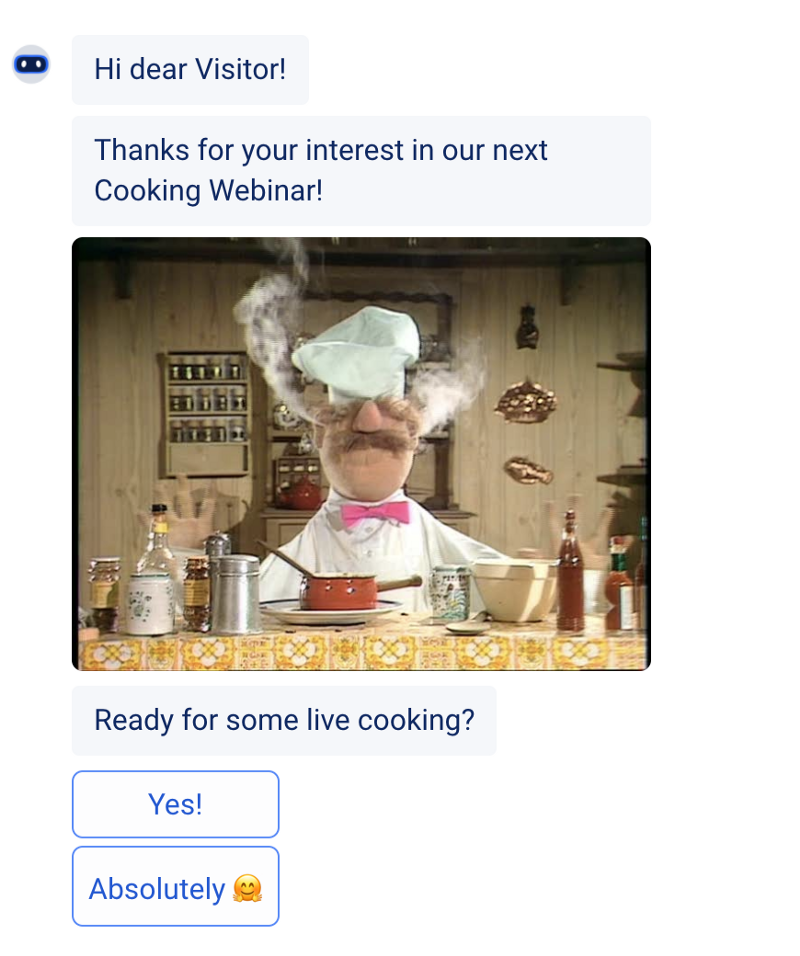
say "Hi dear Visitor!"
say "Thanks for your interest in our next Cooking Webinar!"
say Image("https://www.chez-daphne.com/wordpress/wp-content/uploads/2011/11/swedish_chef.jpg")
say Question("Ready for some live cooking?", buttons=[Button("Yes!"), Button("Absolutely 🤗")])
hold
say "Great! Glad to have you on board."Then, we need to ask the user a few questions and remember the details. For clarity’s sake, let’s create a new section for this:
getData:
say "To register to the webinar, I need to get some information."
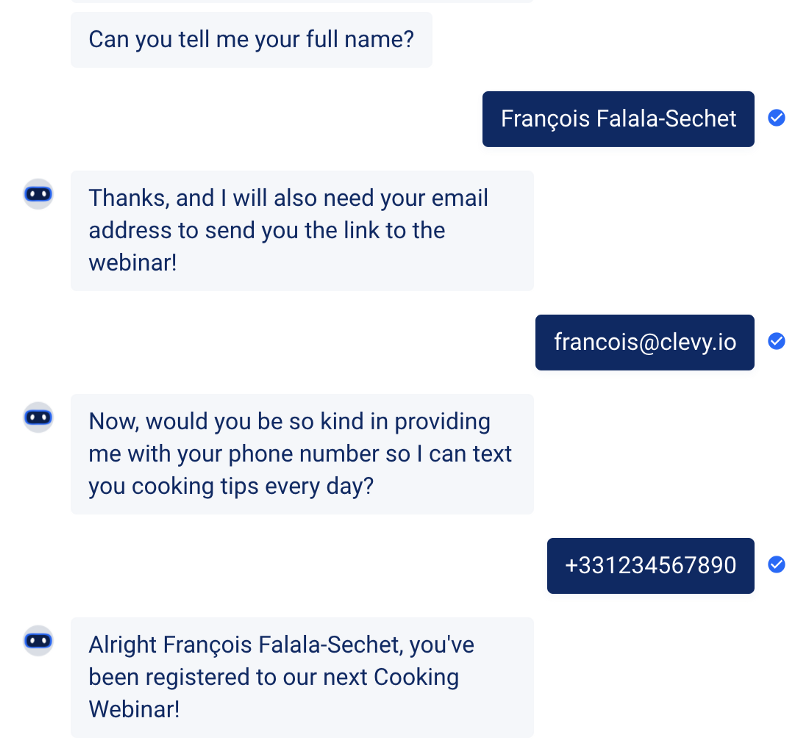
say "Can you tell me your full name?"
hold
remember fullname = event
say "Thanks, and I will also need your email address to send you the link to the webinar!"
hold
remember email = event
say "Now, would you be so kind in providing me with your phone number so I can text you cooking tips every day?"
hold
remember phone = event
goto saveDataOnce we have the data, we need to save it to Google Sheet and close the conversation:
saveData:
  // SAVE DATA ON GOOGLE SHEETS HERE
  goto finish

finish:
  say "Alright {{fullname}}, you've been registered to our next Cooking Webinar!"

  goto end
As you can see, creating the bot itself is quite straightforward. We can now continue with Google Sheets.
Setting up Google Sheets for the Chatbot
1. Creating a Spreadsheet
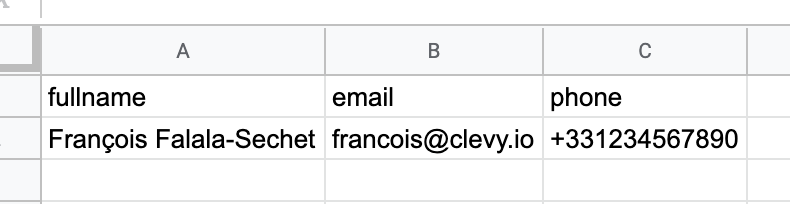
Go to https://docs.google.com/spreadsheets/u/0/ and create a blank spreadsheet. Give it a title, and add a header row with the names of the informations we gathered in our bot (fullname, email, phone). You should have something like this:
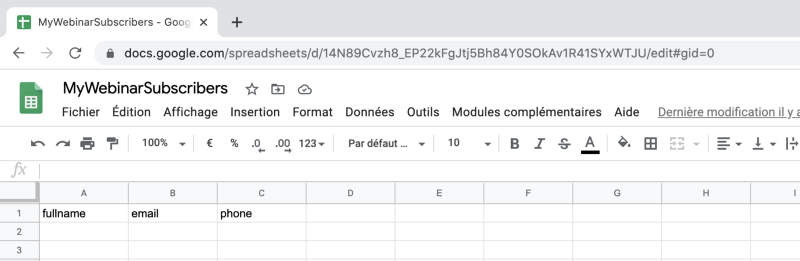
Also, in the URL, take note of the spreadsheet ID (the part between /spreadsheets/d/... and /edit...), you will need it later. In my case, it is 14N89Cvzh8_EP22kFgJtj5Bh84Y0SOkAv1R41SYxWTJU but of course your ID will be different.
2. Create a Google Cloud Service Account
The next part is the tricky part. To let the bot connect to your Google Sheets spreadsheet, you need a service account, an account that is used by a service with a set of permissions to access data on your behalf. This is entirely free, and takes only a few easy steps.
Visit https://console.cloud.google.com/apis/credentials/serviceaccountkey where you should arrive to a screen that looks like the following:
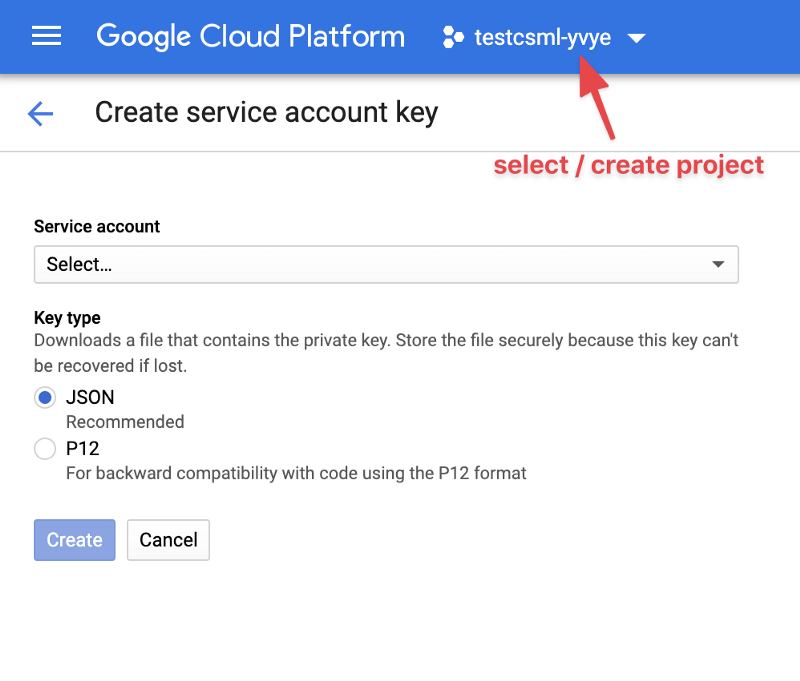
You may first want to create a new Project for this chatbot by clicking the button highlighted above, but it is absolutely not mandatory.
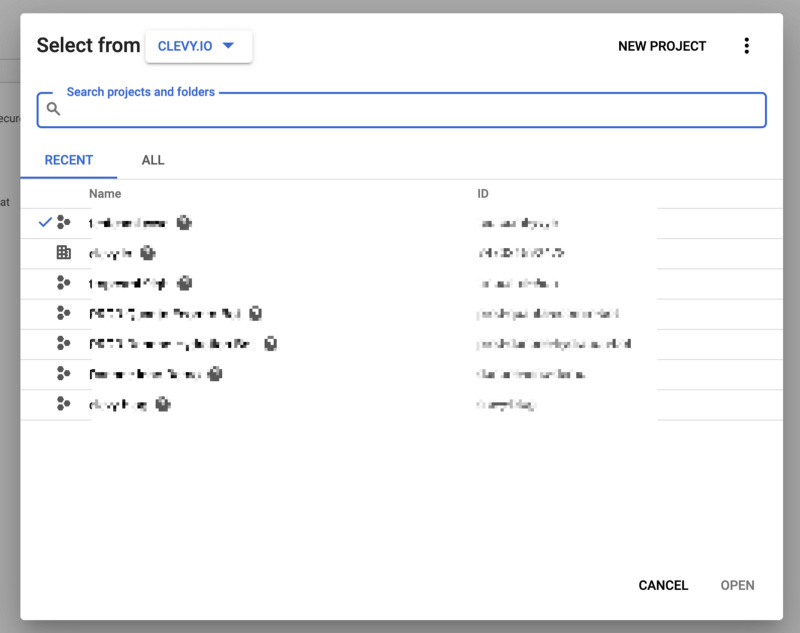
In my case, I’m going to create a new project called GSheetProject. As the creation takes a few seconds, make sure that you select it in the project selector above again after it is ready!
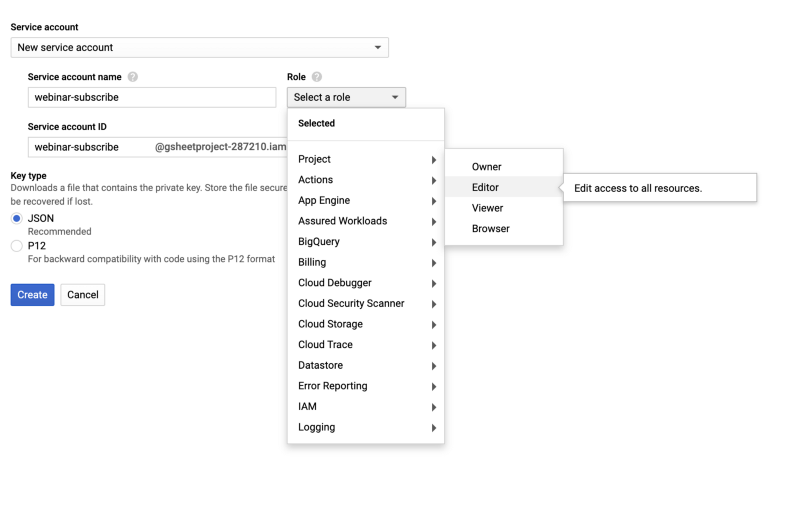
Next, create a service account key. Select New service account, give it a name of your choice, make sure to select Project > Editor under Roles, and select JSON as Key type.
Once it is done, a JSON file should download automatically to your computer. Open it with any text editor and take note of the client_id, private_key and client_email fields.
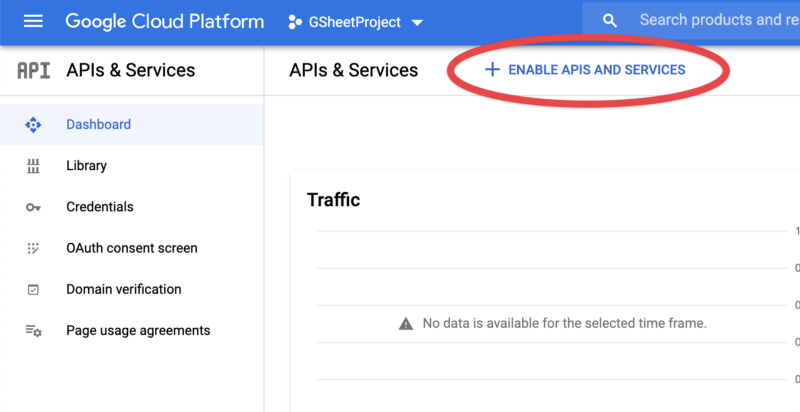
As a final step on Google Cloud console, you need to authorize the Google Sheets API for this project. Go to the APIs and Services Dashboard, and click Enable APIs and Services:
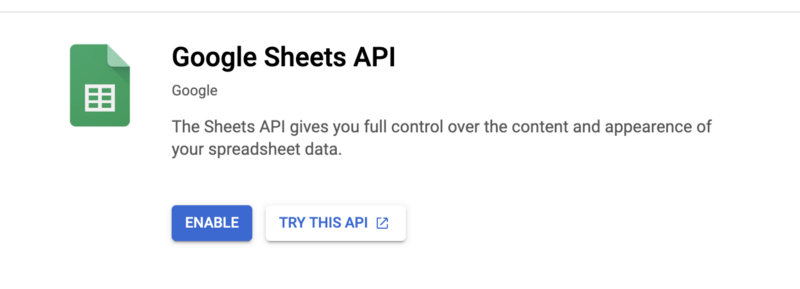
Search for Google Sheets API, and select ENABLE:
3. Authorize the Service Account in your spreadsheet
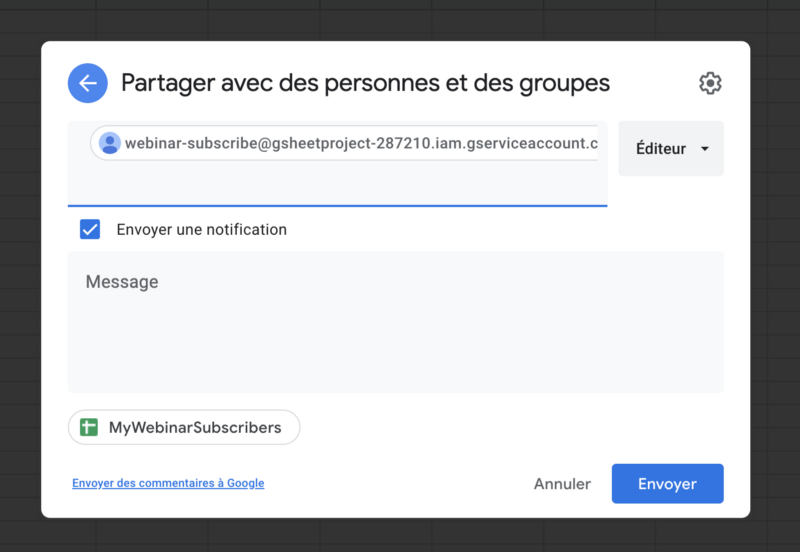
Back on the Spreadsheet, you now need to share the spreadsheet with the Service Account, so that it can access your data. To do that, click on the Share button at the top-right corner as if you were to share the spreadsheet with a friend or colleague.
Get the client_email from the service account info above, and paste it into the box. If you only need the service account to read the data but not modify it, you can simply set it to Reader, but in our case we do need the service account to add data to the sheet so Editor is what we want.
4. Add the Google Sheets integration in CSML Studio
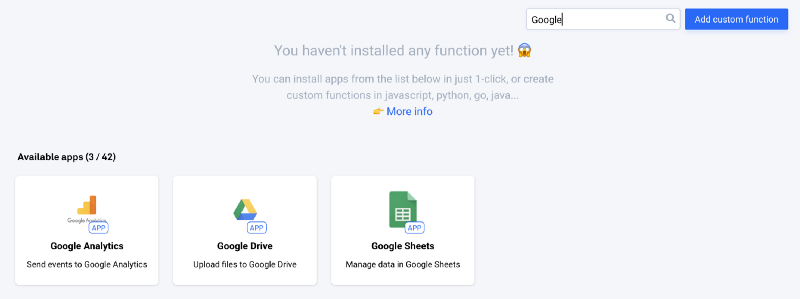
Back to CSML Studio, visits the Functions tab and search for Google Sheets:
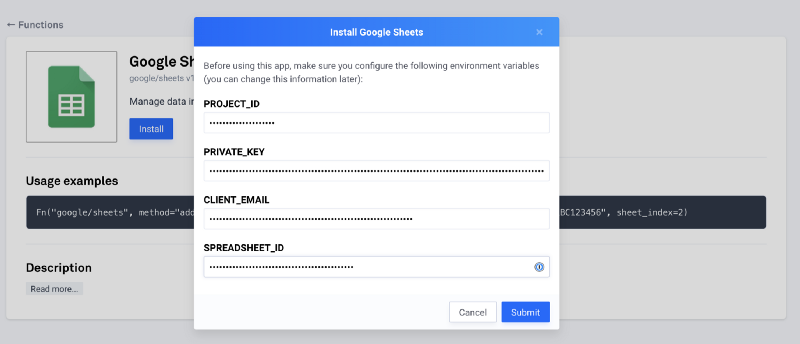
On the next screen, click Install, and paste the data you saved earlier in the corresponding fields, then Submit.
Voilà, Google Sheets is ready to use!
Putting it all together
Now that everything is setup correctly, you can now use Google Sheets in your chatbot!
In the app description there is some documentation on how to use the app, but I’m going to save you some time: you want the “addRow” method, and the row data should be an object containing what we gathered, so:
{“email”: email, “fullname”: fullname, “phone”: phone}Add the following line to the saveData step:
do Fn("google/sheets", method="addRow", row={"email":email, "fullname":fullname, "phone":phone})Now let’s build and run the bot!
And sure enough:
Bonus: Going further
- CSML is an open source project. Give us a ⭐️ on Github here!
- Adapt the content: perhaps you want to get other information from the user (their company, job…) or you want to validate the email address. You can obviously change the content of the chatbot very easily yourself. Here is the full source code of the chatbot, and here is the documentation! Also, join the CSML Slack for more CSML tips and tricks 🤗
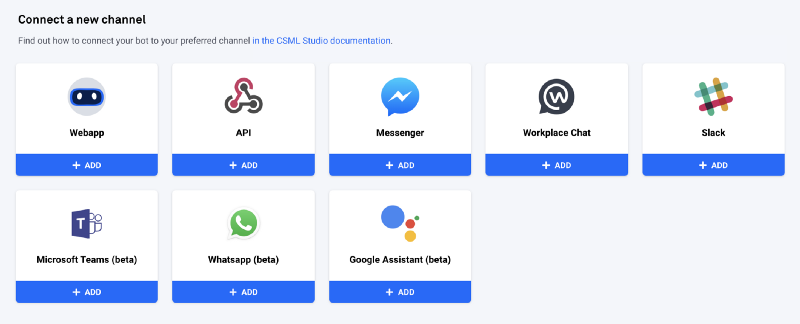
- Deploy the chatbot: you can now deploy this chatbot very easily to any channel (Messenger, Slack, website chat plugin…) by using one of CSML Studio’s available channels: