5 simple tricks to improve your chatbot UX
Create the perfect chatbot with these simple tricks!
Writing copy for a chatbot is not the same as writing for, say, a newspaper or a website. Users don’t use a chatbot the same way they read an article such as this one! As a chatbot creator, you want to keep your users engaged and active throughout the conversation, so that not only they achieve their goal, but also subconsciously want to come back.
After a few years working in this industry, developing hundreds of chatbots used in millions of conversations, and creating one of the leading open-source chatbot development platforms, here are my top 5 tricks to help you build the perfect chatbot.
Use short copy
Bot copy has more to do with tweets than it has to do with books. The biggest issue I’m seeing on bots is huge chunks of heavy text without any pause.
Wherever you can, prefer using short texts, even if that means splitting your text in 2–3 bubbles! It is easier to read, and if you don’t have a talent for writing, it is also easier to write. Win-win!
In general, I tend to try to keep sentences under 90 characters and never use more than 2–3 sentences in the same chat bubble. This makes the bot more pleasant and less tiring to follow.
It is also quite important to not send too many chat bubbles without asking any input from the user. By asking the user to input something (make it fun: it can be just an emoji!) you are keeping them engaged, attentive. If you drop 10 blocks of text at once, chances are the user will not read them or only partially at best.
Add many emojis (and some GIFs, too)
I have yet to meet a customer who tells me they want a dull and boring chatbot. The number 1 request for chatbot personality is “friendly and engaging”.
Voice modulation, intonation and the nuances of body language, which tend to convey our emotions, are lost in text messaging, where the written word is the only available medium to express ourselves. Sarcasm, for example, can be lost in emails and taken literally by the recipient, with unpredictable consequences.
Several studies proved that when used in conjunction with a text message, emojis help show the intensity of the meaning. As they display emotions in a visual manner, they are also more universal and can help non-native speakers of your chatbot’s language better understand the situation, by graphically repeating the written statement.
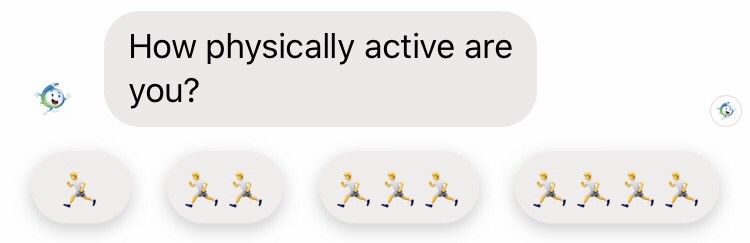
When they are themselves repeated, emoticons can also prove very useful to show scales, such as a star-based rating system or even this example below that conveys both what and how much:
Add typing indicators… and delays!
A good way to make your chatbot look more human-like, is to simulate real interaction times. The first way to do so is to add typing indicators: most chat interfaces support this feature one way or another, and you should definitely use it! It conveys the sense of the time it takes to actually write what’s coming, and gives the user some time to breathe when several bubbles are coming one after another.
I usually tend to base my wait/typing delays on the length of the content that follows. Typings are quite easy to evaluate: I tend to use a duration of about 20–25ms / character in the target message. It kind of looks natural, and as I recommend not to use long texts, it will rarely go over 3000ms which is where it starts to feel long. And I also never use a typing shorter than 500ms as that looks too “jaggy”.
Another very important and often overlooked, yet simple feature is a simple “wait” instruction, without any typing indicator. The way I like to describe the use of “wait” instructions is that waits are used after a message to give you time to read what was just sent without any distraction, while typing is used before a message is sent.
Waits are a bit harder to calibrate. First, you definitely don’t want to use them everywhere, but only where you want to add some breathing time. You also do not want to use them just before asking the user to input something, as they might get ahead of your question, start typing thinking that the bot is done talking, and receive a new message while they are typing.
The starting point I’m using for calculating wait duration is about 40ms/character in the previous text, but sometimes I will use only one wait for several text blocks, or decide to reduce or even entirely get rid of the waiting time. I simply feel it’s easier to remove delays when it effectively feels too slow, than it is to add delays.
Delays of any sort are also very useful in 2 other situations:
- If you know that your users are probably not very used to interacting with chat interfaces, with a fast-paced back and forth of shorter messages, etc: it helps advance the conversation at a pace that feels more comfortable for them. Chatbots targeted at younger or more connected audiences could however go a bit faster!
- In some places where the bot is calculating something, you may want to use the occasion to make the user feel valued, important. These delays effectively mean «Yes, what you are asking me to do is very hard, O Allmighty Human» (while actually spending 99.9% of that time idling). A good way to do that is to say «ok, I’m performing the calculation, it could take a while…» then alternate between one or two Typings and Waits before saying «I’m done! Here are your results…»
You are not the user of your chatbot. You have just spent hours building it and know it inside out – but your users don’t! Give them some space to breathe and they will thank you for it.
Don’t overvalidate user inputs
One rookie mistake I see done over and over again is to try and validate every single user input. This has become sort of a meme over the years, with chatbots saying in a loop «I’m sorry, I didn’t understand, please select one of the possible answers below…».
There are many ways to handle user input gracefully. Here are a few ideas:
- Do you really really need that information? In a recent chatbot we created, quite a few of the questions were optional. In that situation, if the user says something you don’t understand, perhaps you can handle it as a «skip this question» and directly continue to the next question.
- Use buttons if you really need to be sure. It might look old school to use buttons when you could go full natural language processing with today’s tech, but it’s also much (much) quicker to develop and easier to maintain, and quite honestly today’s tech is not exactly great either. The cost of getting a NLP chatbot right is ~100x the cost of getting the same chatbot with buttons right, with a higher chance that you make mistakes along the way or don’t understand something. Is using NLP really generating 100x the ROI for you?
- Use buttons also when you don’t need to be sure. Although it might not look as «innovative», using buttons more often might just result in a better experience for your users, because it directs them to picking a response without having to even think much about how to phrase their answer, and most of the time it’s faster than typing the actual answer in full text. Not everybody is used to interacting with chatbots and sometimes they simply run out of ideas of things to say. They also don’t necessarily know what your bot can do. Buttons are a nice way to suggest them valuable next steps. You can also mix both approaches, by accepting text inputs and buttons. Best of both worlds without too much pressure and risk placed on input validation!
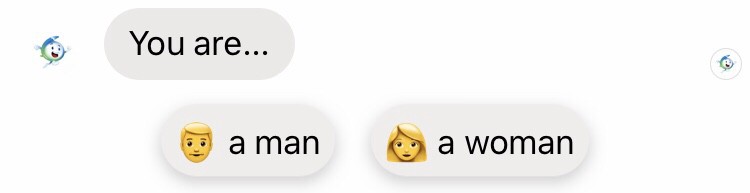
- Some inputs are just made to keep the user engaged. You only need to know that the user is still with you. In the example below, you don’t care that the user really clicks on the emoji or says yes or anything really: this is not a user input, it’s a «I’m still alive and interested enough that I’m saying something to you». Keep it short, sweet and engaging, and you’ll be just fine!
Tying it all together to liven up your introduction
As the saying goes, «You never get a second chance to make a first impression». This is even more true on apps and websites and chatbots which fight for your users’ digital attention.
The first interactions your user will have with your bot are probably the most important ones. It’s the first impression they will have of how you are going to be treated in the next few minutes. Will it get boring, frustrating? Will I have to read through huge chunks of text? Do I get time to read properly or do I get suffocated by new chat bubbles coming up too quickly? While you can get away with cutting a few corners in the meat of your bot, you should definitely pay very close attention to your introduction .
One of the best ways to handle the necessary introduction (usually including a short presentation of the bot, some legal information about what it does with your data, how to interact with the bot, etc.) is to keep the user engaged.
For instance, let’s imagine a chatbot that tries to sell you boats. The following example is a raw example similar to some boats I have seen before, written in CSML, a simple programming language to create rich chatbots on any channel:
say "Hello, I'm Boto, the boat expert"
say "I am in charge of helping you pick the perfect boat for your next boat trip"
say "I have all sorts of boats, large boats, small boats, sailing boats, motor boats"
say "In compliance with all the cookie laws of the world please understand that I will remember your name, email address and boat preferences for all eternity, but you can send a letter to my attorney at 42 Superman street, Smallville, Kansas, to get your data removed from our databases"
say "Now let's get started about boats"
say "What type of boats do you like?"
// ...
You could easily get the same end result in a much more engaging way:
say "Hello, I'm Boto, the boat 🛥 expert"
say Question(
"I am in charge of helping you pick the perfect boat for your next boat trip",
buttons=[Button("Hi, Boto! 👋")]
)
hold
// user clicks button
say Question(
"I have all sorts of boats, large boats 🚢, small boats 🚣♂️, sailing boats ⛵️, motor boats 🚤",
buttons=[Button("I love boats! 🛥")]
)
hold
// user clicks button
say "Me too! 🤩"
say Image("Cool gif of a funny boat")
say Typing(1500)
say Question(
"Now, before we start, I must tell you something 🤫...",
buttons=[Button("What is it? 🤨")]
)
hold
// user clicks button
say "📑 In compliance with data privacy laws, you need to know that I will learn your name, email address and boat preferences. You can read the full privacy statement here: https://example.com/privacy"
say "Of course, if you want to know more, say 'privacy' at any time in the conversation, or send an email to contact@example.com"
say Question(
"Do you agree with that? 😊",
buttons=[Button("Sure! 👌"), Button("More info ℹ️")]
)
hold
// user clicks one of the buttons
say "Alright 🤗! Now let's get started about boats already."
say Question(
"What type of boats do you like?",
buttons=[Button("🚤"), Button("⛵️"), Button("🚢"), Button("🚣♂️"), Button("suprise me! 🍻")]
hold
// ...Sure, it takes more space to write all of this. But it is much more interactive and entertaining for the user, who will for sure remain engaged until the end of the script!
Conclusion
Whether you are a beginner or advanced chatbot builder, I encourage you to try and apply each of these simple tricks in your next chatbot project. Of course, there are exceptions to every rule; these are simply some tricks I’ve learnt on my journey as a chatbot enthusiast and builder of hundreds of chatbots.
I encourage you as well to go and try the cool CSML.dev open-source chatbot framework, which makes it super easy to fine-tune your chatbot experience to the perfection without the hassle of using more complex frameworks such as Botkit or Rasa, or suffering from the limitations of graphical bot builders like Chatfuel or Manychat. Using CSML you will experience complete creative freedom over your content and user experience, while ensuring full compatibility with other APIs and services and easy chatbot maintenance too!
👉 Try CSML now with CSML studio
👉 Get the CSML engine on github